Buying a graduation card from a store shelf is fine, but have you ever imagined a DIY graduation card and the different kind of weight it carries, the recipient knows you sat down and made something specifically for them, and that intention comes through even in the simplest designs.
Here’s the catch, you don’t need to be crafty, artistic, or in possession of a craft room to make a card that looks genuinely thoughtful. Most of these ideas require nothing more than basic supplies you may already have at home, and a little bit of time and care. A homemade card paired with a heartfelt message can be the most memorable part of a graduation gift, sometimes even more than the gift itself.
Below are graduation card ideas organized by skill level, from complete beginner to someone with a little more confidence with crafts, so you can find the right fit and get started.
You will also like;
20 Graduation Gift Ideas They Will Actually Use And Appreciate
College Graduation Party Decorations, Food And Games; In One Guide
Best Graduation Cupcake And Cake Table Ideas For 2026
Basic Supplies
Before we get into the ideas, here’s a simple list of supplies that covers almost every card on this list. You won’t need everything for every idea, just pick what applies to the cards you choose.
- Cardstock or thick paper in white, cream, or a color you like
- A bone folder or ruler for clean folds
- Scissors and a craft knife (or just scissors)
- A pencil, pens, and markers in various thicknesses
- Adhesive, a glue stick, double-sided tape, or a hot glue gun
- Craft embellishments, ribbon, twine, washi tape, stickers, glitter
- Stamps and ink pads (optional, but helpful)
- A printer for any printed elements
- Watercolor paints (optional, for the watercolor ideas)
Easy DIY Graduation Card Ideas Anyone Can Make
Beginner-Friendly Cards
1. The Simple Folded Card With a Handwritten Message
Sometimes the simplest card is the most sincere. Fold a piece of cardstock in half, write a meaningful message in your best handwriting, and add a simple drawn border, a few stars, or a small doodle on the front. A clean, simple card with genuine words inside will always be received better than an elaborate card with a generic message.
What you need: Cardstock, a marker or pen.
Use a light pencil line as a guide before writing with marker so your text stays straight, then erase it once the ink dries.
2. A Washi Tape Border Card
Washi tape is one of the most beginner-friendly craft supplies available, it comes in dozens of colors and patterns, is easy to apply and reposition, and instantly makes a plain card look polished. Simply apply strips of washi tape around the border of a plain folded card, layer a few patterns for interest, and add a simple message inside.
What you need: Cardstock, washi tape, a pen.
You will also like;
35 Graduation Cake Ideas That Will Steal The Show At Any Party
Budget-Friendly Graduation Party Ideas Parents Will love
25 High School Graduation Party Ideas To Celebrate Your Teen In Style
3. A Sticker-Decorated Graduation Card
Pick up a small sheet of graduation-themed stickers (or general celebration stickers in school colors) and arrange them on the front of a folded card. Add a simple message with a marker, “Class of [Year],” “Congrats, Graduate!”, and you have a card that looks intentional without requiring any drawing or artistic skill.
What you need: Cardstock, graduation stickers, a marker.
4. A Printed Sentiment Card
Design a simple card front on your phone or computer using a free tool like Canva, just text on a colored background with the graduate’s name and year, and print it at home. Trim and fold, then add a handwritten message inside. This method gives you a clean, professional-looking front with the personal warmth of a handwritten interior.
What you need: Cardstock or photo paper, a printer, a pen.
You will also like;
15 Easy All-Day Crockpot Recipes For Busy Moms
30 Fun Screen-Free Summer Activities For Busy Toddlers
15 Summer Play water Activities For Toddlers
5. A Ribbon and Bow Card
Fold a piece of cardstock and punch two small holes near the top center of the front panel. Thread a length of ribbon through both holes and tie it into a bow on the front. Add a simple stamped or written message below the bow. The ribbon immediately makes the card feel more decorative than a plain folded card.
What you need: Cardstock, ribbon, a hole punch, a pen or stamp.
Easy DIY Graduation Card Ideas Anyone Can Make
Intermediate Ideas (A Little More Detail, Still Very Doable)
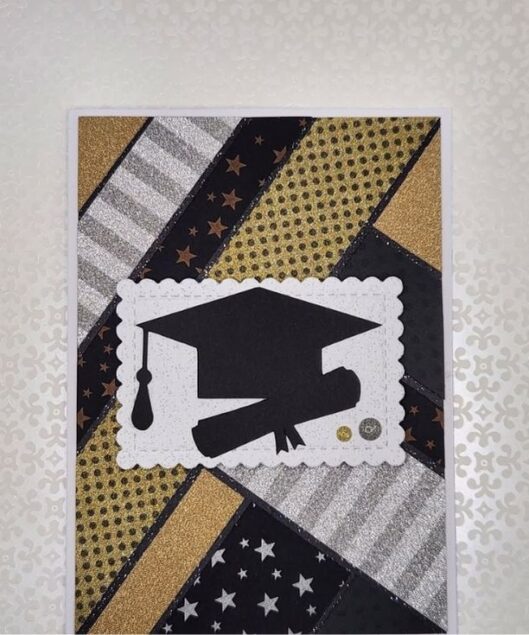
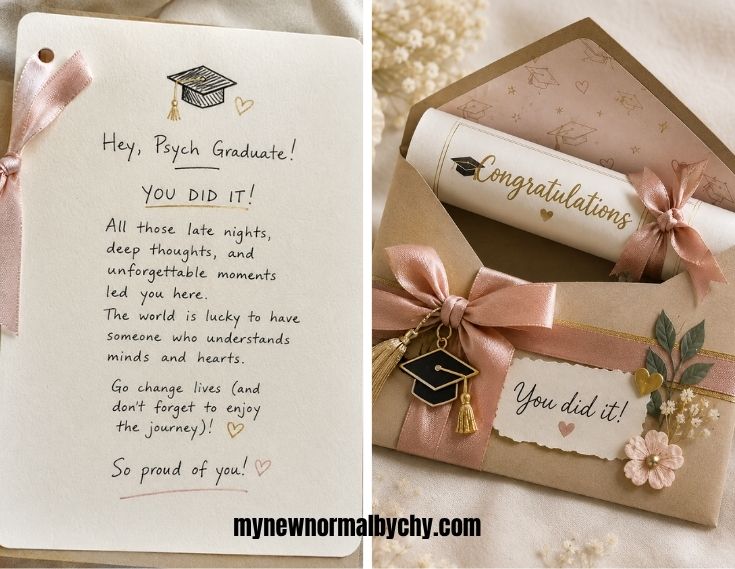
6. A Graduation Cap Card
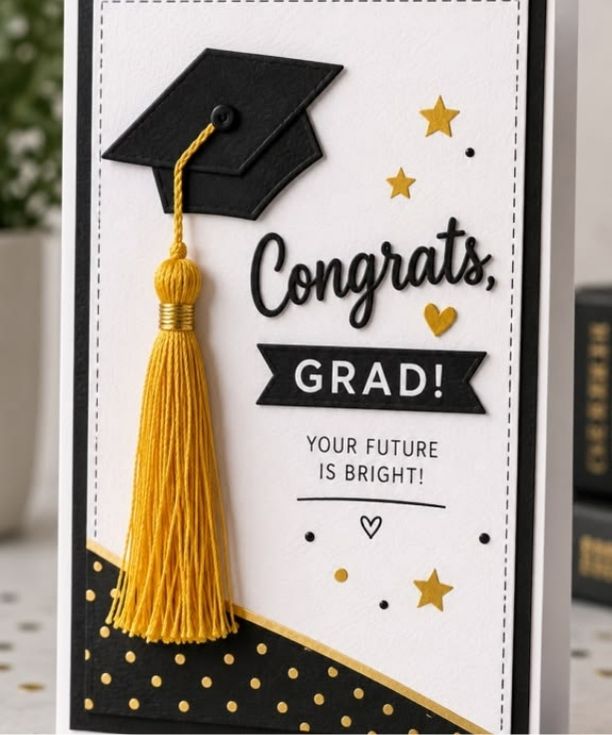
Draw or trace a simple graduation cap shape onto black cardstock and cut it out. Attach it to the front of a folded card using a glue stick, then add a tassel made from a short piece of embroidery thread or yarn tied at the top. Add the year and a simple message below the cap. This is one of the most classic graduation card designs and is far simpler to execute than it looks.
What you need: Black cardstock, yellow or gold embroidery thread or yarn, a glue stick, a gold marker for the year.
You will also like;
The Best Sensory Play Ideas For Rainy Days
Backyard Summer date Night Ideas for Couples
25 Sensory Play Ideas For Toddlers With Autism
7. A Watercolor Wash Card
You don’t need to be a watercolor artist for this one. Simply wet a piece of watercolor paper or thick cardstock with a damp brush, then drop in one or two colors and let them spread and blend naturally. Once completely dry, add a simple stamped or hand-lettered message on top. The result looks intentional and artistic with very little actual technique required.
What you need: Watercolor paper or thick cardstock, watercolor paints, a brush, a stamp or fine pen.
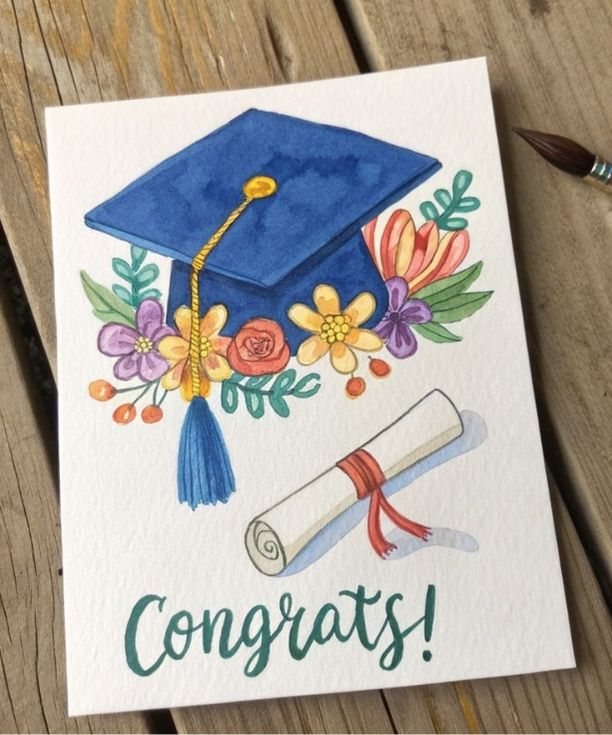
8. A Paper Diploma Card
Cut a rectangle of off-white or cream paper to resemble a diploma scroll. Lightly distress the edges with a brown ink pad or a slightly damp finger dipped in brown eyeshadow for a vintage feel. Write a “congratulatory degree” message on the interior (something fun, like “Bachelor of Awesomeness, with Honors”) and roll it up to slip inside a simple card envelope or tie with a small ribbon.
What you need: Cream cardstock, a brown ink pad, a pen, ribbon.
You will also like;
The Best Vegetable Bowls For Maximum Flavour
Fastest One-Pan Quick Meals That Save Time And Reduce Cleanup
Best Savory Sourdough Discard Recipes For Lunch And Dinner
9. A Photo Card

Choose a favorite photo of yourself with the graduate or a meaningful photo from their journey, print it wallet-sized, and adhere it to the front of a folded card. Frame it with a small strip of washi tape or a simple hand-drawn border. A card with a real photo on it tends to hold a special place long after graduation season is over.
What you need: A printed photo, cardstock, washi tape or a pen for the border, glue.
10. A Layered Card With Patterned Paper
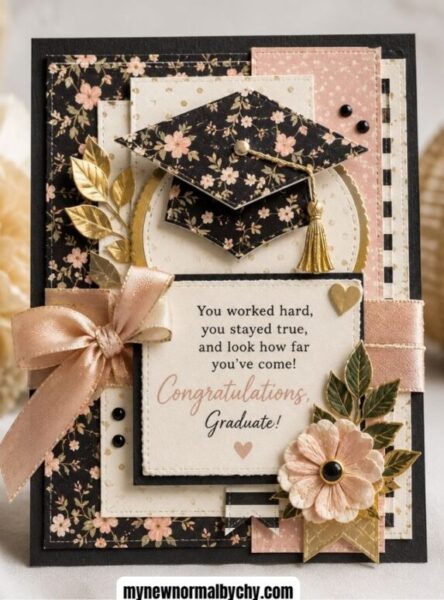
Cut a piece of patterned scrapbook paper slightly smaller than the front of your card and adhere it as a background layer. Layer a second, smaller piece in a complementary pattern or solid color on top, and add a final embellishment, a stamped cap, a sticker, or a hand-lettered sentiment, to complete the design.
What you need: Cardstock, two pieces of patterned paper, adhesive, a stamp or pen.
You will also like;
Quick Sourdough Discard Breakfast Recipes For Busy Moms
Kid-Friendly Salad Recipes Picky Eaters Will Love
Healthy Weight Loss Summer Meal Ideas (Simple & Satisfying )
Easy DIY Graduation Card Ideas Anyone Can Make
More Creative Ideas for the Crafty Types
11. A Pop-Up Graduation Cap Card
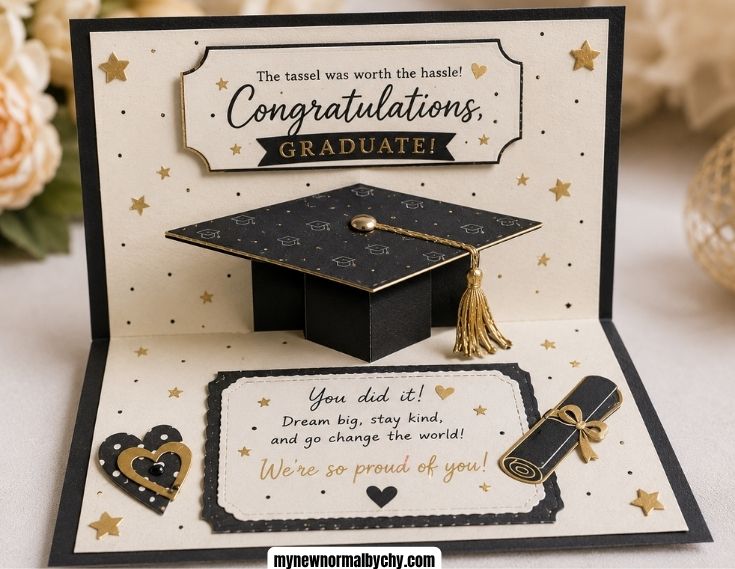
Score and fold a small piece of black cardstock into a simple pop-up element, a graduation cap that stands up when the card is opened. There are free templates for basic pop-up mechanisms available online if you search “simple pop-up card template.” The effect is impressive for how little effort the mechanism actually takes.
What you need: Black and white cardstock, a craft knife, a ruler, adhesive.
12. A Hand-Lettered Chalkboard Card
Use black cardstock as your base and write your message in white chalk marker or a white paint pen, mimicking the look of a chalkboard sign. A simple layout, the graduate’s name at the top, a meaningful quote in the center, and the year at the bottom, looks polished and reads immediately as intentional.
What you need: Black cardstock, a white chalk marker or white paint pen.
13. A Shaker Card
Create a small window in the front of a card using a craft knife, then seal a layer of acetate behind it. Fill the space between the acetate and an inner card layer with small confetti or tiny star-shaped sequins that shift when the card is moved. This style of card gets a genuine reaction from recipients and is more approachable than it looks.
What you need: Cardstock, acetate sheet (from a stationery or craft store), craft knife, foam adhesive strips, confetti or sequins.
14. A Stamped Quote Card
Purchase or borrow a stamp set with a meaningful quote or a simple “congratulations” sentiment. Stamp the message onto a neutral piece of cardstock, color in any illustrated elements with colored pencils or watercolors, and mount it on a slightly larger piece of contrasting paper for a clean, framed look.
What you need: Stamp set, ink pad, cardstock, colored pencils or watercolors.
15. A String Art Card
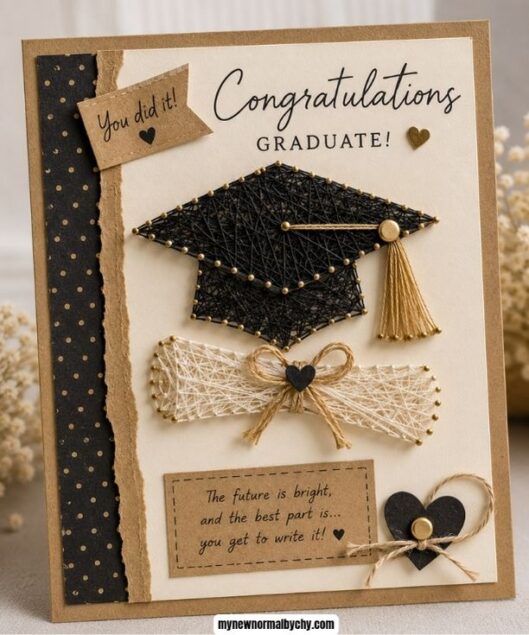
Lightly sketch a simple graduation cap or diploma shape on the front of a card. Using a needle and embroidery thread, stitch around the outline of the shape with small, even stitches to create a sewn design on the card front. This technique feels unexpected and handcrafted in a way that most store-bought cards could never replicate.
What you need: Thick cardstock, a needle, embroidery thread, a pencil, tape (to secure thread ends on the back).
Tips for Writing a Message That’s Worth the Card
A beautiful card falls a little flat if the message inside doesn’t match the effort. Here are a few practical tips for writing something genuine and memorable.
Be specific, not general. “You worked so hard for this” lands differently when followed by a specific memory, “I still remember how many nights you stayed up studying for finals”, rather than staying at a surface level.
Acknowledge what’s next, not just what’s done. Graduation is as much about what’s ahead as what’s been completed. Mentioning their next step, even briefly, shows you’re paying attention to their journey.
Keep it relatively short. A card is not the place for a long speech. A few sincere, specific sentences almost always land better than a long paragraph of general praise.
End with something forward-looking. A closing line like “I can’t wait to see what you do next” or “The next chapter is going to be something” gives the card a sense of momentum and excitement rather than just closure.
Write a draft first. On a spare piece of paper, write what you’d say, read it back, cut what feels unnecessary, and then transfer the final version into the actual card. It prevents the all-too-common regret of running out of space or making an error mid-sentence.
You will also like;
Simple Summer Self-Care Ideas For Busy Moms
Time Management Tips For Sta -At -Home Moms
How To Create A Family Morning Routine That Actually Works
The Value of Something Made by Hand
In a world where it’s easy to grab a pre-printed card from a store rack and call it done, choosing to make something by hand sends a message before the recipient has even read a single word. It says that you thought about them specifically, made time for them, and this milestone mattered enough to you to be worth creating something unique.
It doesn’t have to be perfect. Just make them with care, and that tends to be exactly enough.
Leave a Reply