Want to transform a plain pair of shoes into something stylish, unique, and eye-catching? This Easy DIY Bedazzled Shoes for Beginners tutorial will show you exactly how to create sparkling custom shoes, even if you’ve never done a craft project before.
Even if you’re customizing white sneakers, old trainers, canvas shoes, or wedding sneakers, bedazzling is an affordable way to give them a brand-new look. From subtle crystal accents to full rhinestone-covered designs, this guide walks you through everything you need to know.
If you’re looking for DIY rhinestone sneakers, custom bling shoes, glitter sneakers, or beginner-friendly shoe decorating ideas, you’re in the right place.
Why Bedazzle Your Sneakers?
Bedazzled sneakers have become incredibly popular because they’re fashionable, customizable, and surprisingly easy to make.
People love them because they:
- Add personality to simple shoes
- Cost much less than designer embellished sneakers
- Make thoughtful handmade gifts
- Are perfect for birthdays, concerts, festivals, weddings, and vacations
- Allow you to revive worn sneakers instead of throwing them away
- Can be customized to match almost any outfit
Whether your style is minimalist, glamorous, vintage, or Y2K-inspired, there’s a design to suit your taste.
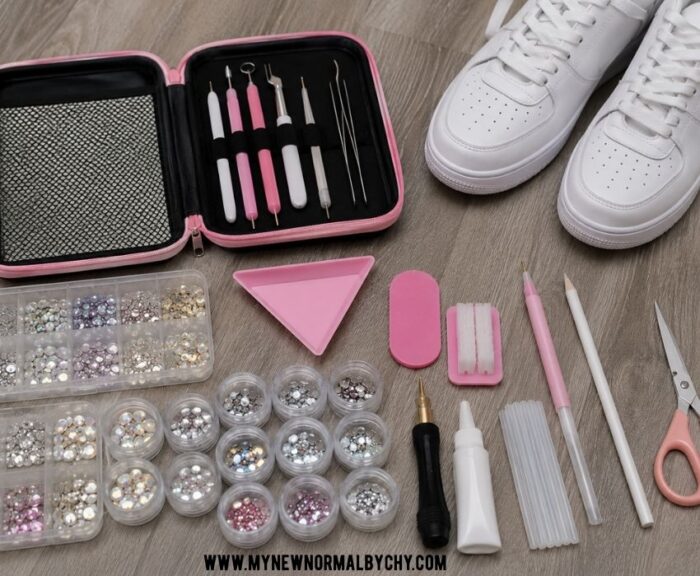
Supplies You’ll Need
Before you begin, gather these materials.
Essential Supplies
- White sneakers or canvas shoes
- Flat-back rhinestones
- Mixed-size crystals
- Strong fabric adhesive (such as E6000 or Gem-Tac)
- Wax rhinestone picker
- Tweezers
- Small sorting tray
- Cotton swabs
- Rubbing alcohol
- Soft cloth
Optional Decorations
- Faux pearls
- Metallic studs
- Letter charms
- Shoe charms
- Mini pearls
- Butterfly embellishments
- Ribbon laces
- Glitter laces
- Metallic paint pens
Choosing the Best Sneakers for Bedazzling
One of the biggest factors in creating beautiful DIY bedazzled sneakers in this Easy DIY Bedazzled Shoes for Beginners is choosing the right pair of shoes. While almost any sneaker can be customized with rhinestones, pearls, or charms, some materials are much easier to work with than others.
If you’re a beginner, selecting the right type of sneaker will make the decorating process smoother and help your design last longer. Look for shoes with clean lines, smooth surfaces, and minimal stitching so your embellishments can adhere properly.
Here are the best sneakers to use for your Easy DIY Bedazzled Shoes for Beginners project
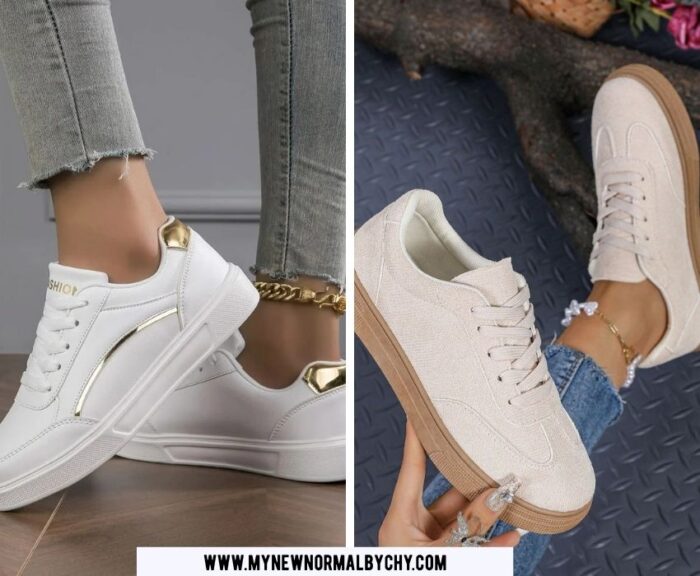
1. Leather Sneakers
Leather sneakers are one of the most popular choices for DIY bedazzling because they have a smooth, non-porous surface that makes it easy to create clean, elegant designs. Their polished appearance also gives your finished project a luxurious, high-end feel.
They’re especially perfect if you’re aiming for subtle sparkle rather than covering the entire shoe with rhinestones in this Easy DIY Bedazzled Shoes for Beginners.
Leather sneakers are ideal for:
- Crystal borders around the sole or toe cap
- Elegant pearl accents
- Luxury-inspired designer looks
- Minimalist rhinestone patterns
- Monograms or personalized initials
- Wedding sneakers for brides
A pair of plain white leather sneakers provides the perfect blank canvas and pairs beautifully with clear crystals, pearls, silver embellishments, or champagne-colored rhinestones.
Before decorating, wipe leather sneakers with rubbing alcohol to remove oils and dirt. This helps the adhesive bond more securely.
Check out our
25 Surfside Nail Ideas for the Perfect Beach Inspired Manicure
20 Short Summer Nail Ideas for Moms Who Like to Keep Things Simple
Natural Looking Summer Nail Designs for Moms Over 30
Short Summer Nail Ideas For Moms With Low Maintenance Styles
45 Cute Halloween Nails You’ll Want to Copy This Spooky Season
2. Canvas Sneakers
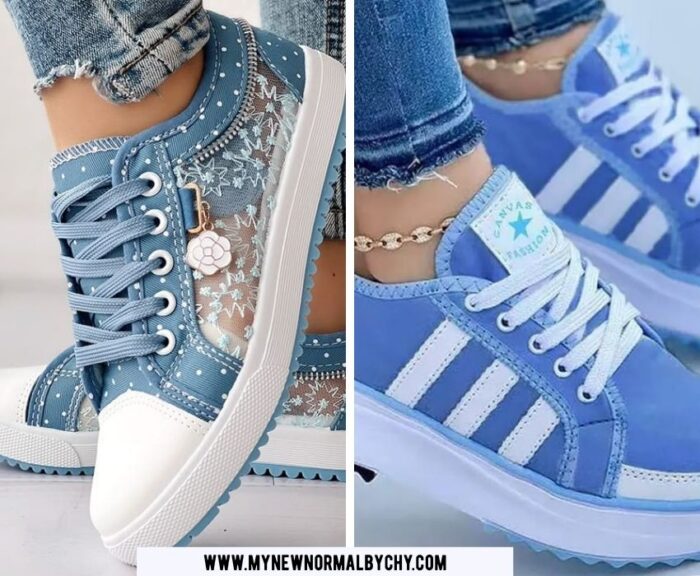
If you’re new to DIY shoe decorating, canvas sneakers are one of the easiest options to work with. The fabric surface holds adhesive well, making it less likely for rhinestones and embellishments to shift during application.
Canvas shoes also offer more creative freedom because they can be decorated from heel to toe without worrying about slippery surfaces in this Easy DIY Bedazzled Shoes for Beginners.
They’re perfect for bold, colorful, and artistic designs.
Canvas sneakers work beautifully for:
- Full rhinestone coverage
- Floral patterns
- Butterfly designs
- Cartoon-inspired artwork
- Y2K aesthetics
- Rainbow and ombre color gradients
- Seasonal themes like Halloween or Christmas
- Hand-painted details combined with rhinestones
Classic white canvas sneakers are especially versatile because they allow every crystal color to stand out.
Because canvas is absorbent, apply glue in small sections instead of covering large areas at once. This gives you more control and helps create a neat, professional finish for Easy DIY Bedazzled Shoes for Beginners.
3. Slip-On Sneakers
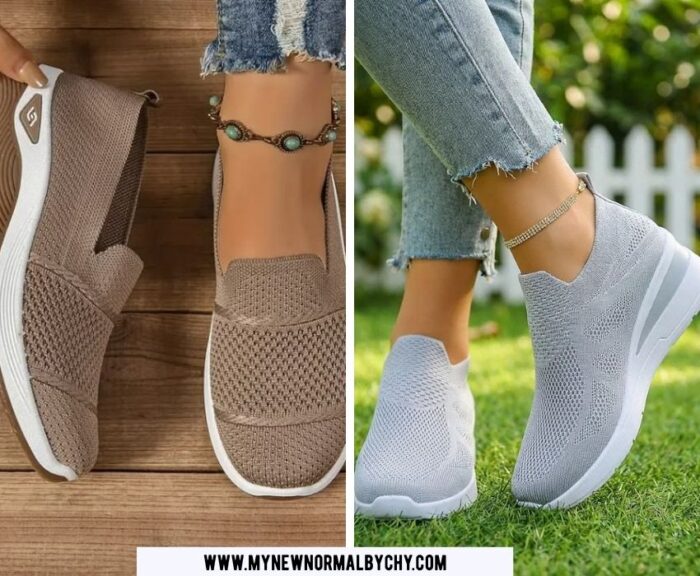
Slip-on sneakers are another excellent choice, especially for beginners. Since they don’t have laces, eyelets, or tongue sections to work around, they provide a large, uninterrupted surface that’s easy to decorate.
Their simple shape also makes it easier to plan symmetrical designs, making them a great option for your first Easy DIY Bedazzled Shoes for Beginners project.
Slip-on sneakers are great for:
- All-over rhinestone designs
- Geometric patterns
- Floral arrangements
- Glitter gradients
- Large statement embellishments
- Personalized names or initials
- Seasonal and holiday-themed designs
Because the surface is smooth and uncluttered, you can experiment with larger rhinestones, pearls, or decorative charms without the design feeling crowded.
If you’re creating matching shoes for weddings, birthdays, or special events, slip-on sneakers provide plenty of space to add meaningful details like initials, dates, or themed embellishments.
Which Sneakers Are Best for Beginners?
If you’re trying bedazzling for the first time, here’s a quick guide in this Easy DIY Bedazzled Shoes for Beginners to help you choose:
| Sneaker Type | Best For | Difficulty |
|---|---|---|
| Leather Sneakers | Elegant, luxury, and bridal designs | Beginner |
| Canvas Sneakers | Full rhinestone coverage and colorful DIY projects | Beginner |
| Slip-On Sneakers | Simple, symmetrical, and personalized designs | Beginner |
No matter which style you choose, start with a comfortable, well-fitting pair of sneakers that you’ll enjoy wearing. A quality pair of shoes combined with durable rhinestones and strong adhesive will ensure your custom creation looks beautiful and lasts through plenty of wear.
Beautiful Bedazzled Wedding Shoes for Brides
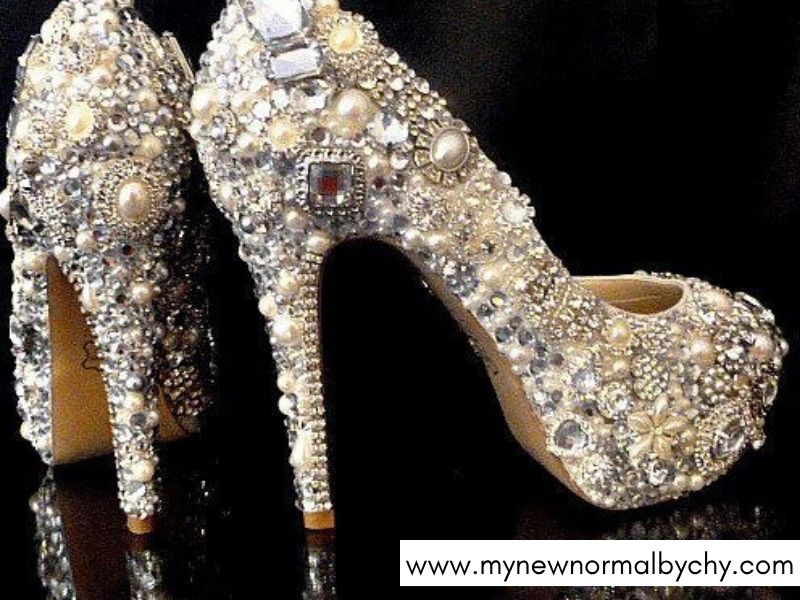
Who says your wedding shoes have to be sky-high heels? More and more brides are choosing beautiful bedazzled sneakers as a stylish and comfortable alternative, especially for wedding receptions, outdoor ceremonies, engagement photos, bridal showers, and honeymoon travel.
Imagine dancing the night away without sore feet while still wearing shoes that sparkle just as much as your wedding dress. A pair of custom bedazzled sneakers offers the perfect balance of elegance, comfort, and personality, making them a practical choice you’ll actually want to wear again after your big day.
Why Brides Love Bedazzled Wedding Shoes
Bedazzled wedding sneakers have become a favorite among this Easy DIY Bedazzled Shoes for Beginners especially for modern brides because they offer:
- All-day comfort without sacrificing style
- A unique, personalized touch that reflects your personality
- Beautiful sparkle that complements bridal gowns
- Practical footwear for dancing, walking, and long wedding celebrations
- A keepsake you can treasure long after the wedding
Whether you’re planning a grand ballroom reception, a rustic barn wedding, a beach ceremony, or an intimate garden celebration, embellished bridal sneakers can fit beautifully with almost any wedding theme.
You may also like:
What to put in a postpartum basket for a real recovery
15 Comfortable Postpartum Outfits That Hide The Mom Pooch Beautifully
Pool And Spa Accessories Every Postpartum Mom Needs
How to Create Elegant Bridal Sneakers
The secret to luxurious-looking wedding shoes is choosing embellishments that enhance your design without overwhelming it. Aim for timeless elegance rather than covering every inch with decorations.
Some beautiful embellishments include:
- Crystal rhinestones for brilliant sparkle
- Faux pearls for a soft, romantic finish
- Iridescent gems that shimmer in different lighting
- Satin bows for a feminine touch
- Delicate lace appliqués to echo your wedding dress
- Tiny floral embellishments
- Silver or gold metallic accents
- Monogram initials or your wedding date for a personalized keepsake
Sticking to a cohesive color palette, such as white, ivory, champagne, silver, or soft blush—creates a sophisticated look that photographs beautifully.
Stunning Bedazzled Wedding Shoe Ideas
Still deciding how you want your bridal sneakers to look? Whether your wedding style is classic, modern, boho, or glamorous, there’s a beautiful design to suit every bride. The best part about easy DIY bedazzled shoes for beginners is that you can customize every detail to reflect your personality and wedding theme.
From sparkling crystals to delicate pearls and romantic lace, these stunning ideas will help you create wedding shoes that are not only comfortable but also worthy of your big day in this Easy DIY Bedazzled Shoes for Beginners below:
1. Classic Crystal Sneakers
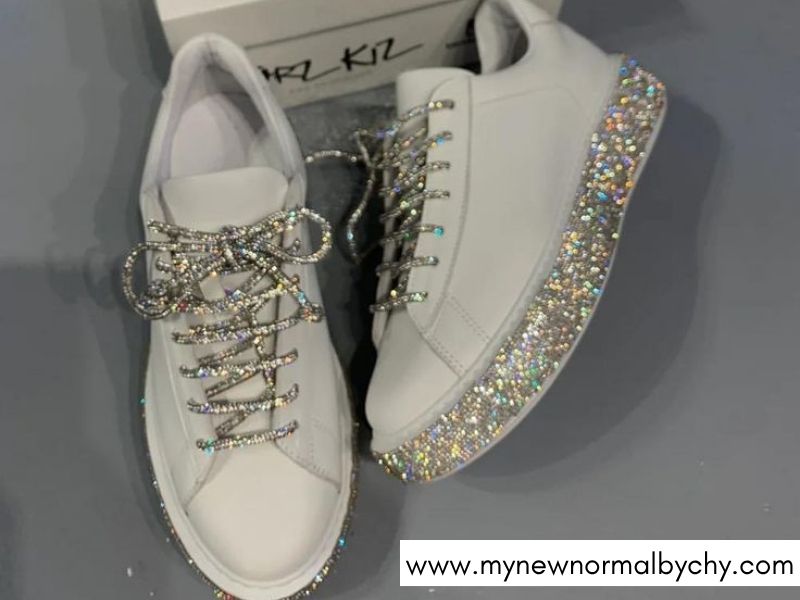
If you’re dreaming of timeless elegance, you can never go wrong with all-over crystal embellishments. This design uses clear or silver rhinestones to create a sophisticated sparkle that catches the light beautifully as you walk down the aisle or dance the night away.
For a refined look, decorate only the toe cap, heel, or side panels while leaving some of the white sneaker visible. If you prefer maximum glamour, cover the entire shoe with crystals for a dazzling, red-carpet-worthy finish.
Perfect for:
- Traditional weddings
- Ballroom receptions
- Black-tie celebrations
- Brides who love timeless elegance
2. Pearl Bridal Sneakers
Pearls have long been associated with bridal fashion, making them the perfect embellishment for wedding sneakers. Mixing different pearl sizes creates depth and texture while giving your shoes a soft, luxurious appearance.
You can cover the entire sneaker with pearls or simply accent the heel, toe cap, or sides for a more understated design. Pairing pearls with a few tiny crystal rhinestones adds just the right amount of sparkle without overwhelming the look.
These sneakers pair beautifully with satin, lace, tulle, and minimalist wedding dresses.
Perfect for:
- Romantic weddings
- Garden ceremonies
- Classic bridal gowns
- Elegant minimalist brides
3. Lace & Pearl Combination
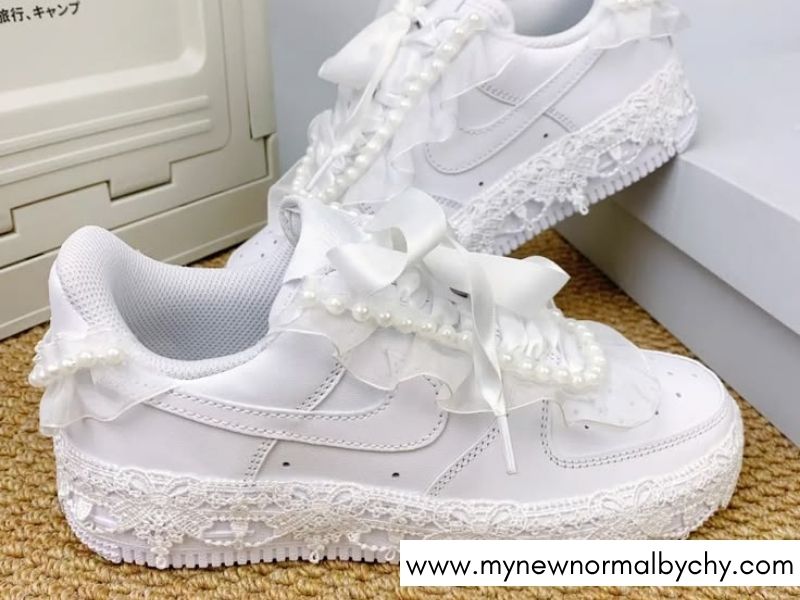
For brides who adore delicate details, combining lace appliqués with pearls creates an effortlessly romantic design. Carefully attach pieces of bridal lace to your sneakers before outlining the patterns with miniature pearls or crystal rhinestones.
This technique allows your shoes to beautifully echo the lace detailing on your wedding dress, creating a cohesive bridal look from head to toe.
You can even use leftover lace from your gown alterations or veil, making your sneakers even more sentimental and unique.
Perfect for:
- Vintage weddings
- Lace wedding dresses
- Fairytale-inspired celebrations
- Romantic bridal styles
4. Personalized Wedding Shoes
Your wedding shoes can become one of the most meaningful keepsakes from your special day. Adding personalized details transforms a simple pair of sneakers into something you’ll treasure for years.
Some creative personalization ideas include:
- Your new initials
- Your wedding date
- “Mrs.” followed by your new surname
- A meaningful quote
- Tiny hearts
- Infinity symbols
- Your partner’s initials
- A small charm representing your love story
Metallic lettering, crystal rhinestones, or pearl embellishments all work beautifully for this design.
Every time you wear your sneakers after the wedding, they’ll remind you of one of the happiest days of your life.
5. Champagne Sparkle Sneakers
If bright silver crystals aren’t your style, champagne-colored rhinestones offer a softer, warmer sparkle that’s incredibly elegant.
Pair champagne crystals with ivory pearls, gold accents, or warm nude gemstones to create a luxurious, high-end look that photographs beautifully in both daylight and evening receptions.
This color palette complements ivory wedding dresses particularly well and feels effortlessly sophisticated.
Perfect for:
- Vintage weddings
- Rustic venues
- Neutral color palettes
- Gold wedding themes
6. Floral Crystal Design
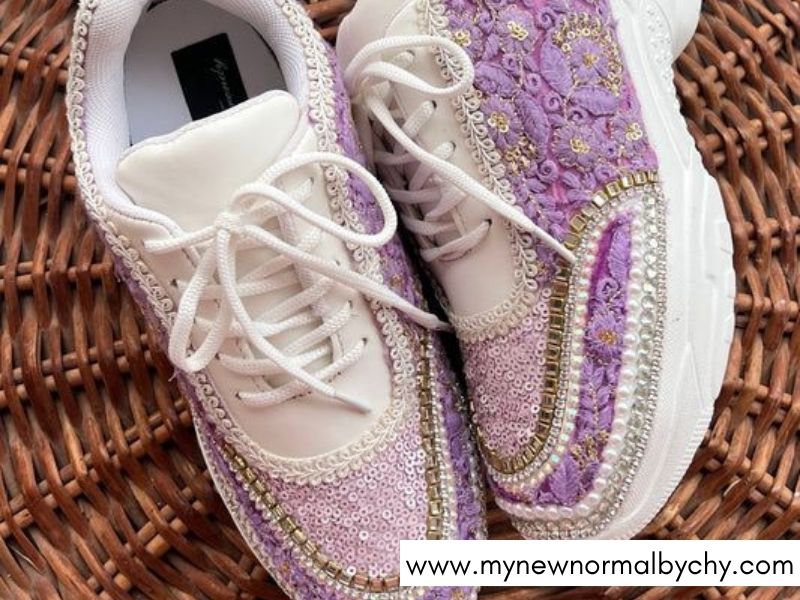
Flowers never go out of style, especially on your wedding day. Create delicate floral arrangements using crystal rhinestones, pearl centers, and tiny leaves made from marquise-shaped gems.
Instead of covering the entire sneaker, position the floral clusters around the sides, heel, or toe while leaving plenty of white space. This creates a light, airy design that feels elegant rather than crowded.
For an even more personalized touch, choose flowers that match your bridal bouquet or wedding décor.
Beautiful floral choices include:
- Roses
- Daisies
- Cherry blossoms
- Baby’s breath
- Wildflowers
- Peonies
The result is feminine, romantic, and perfect for spring or summer weddings.
7. “Something Blue” Sneakers
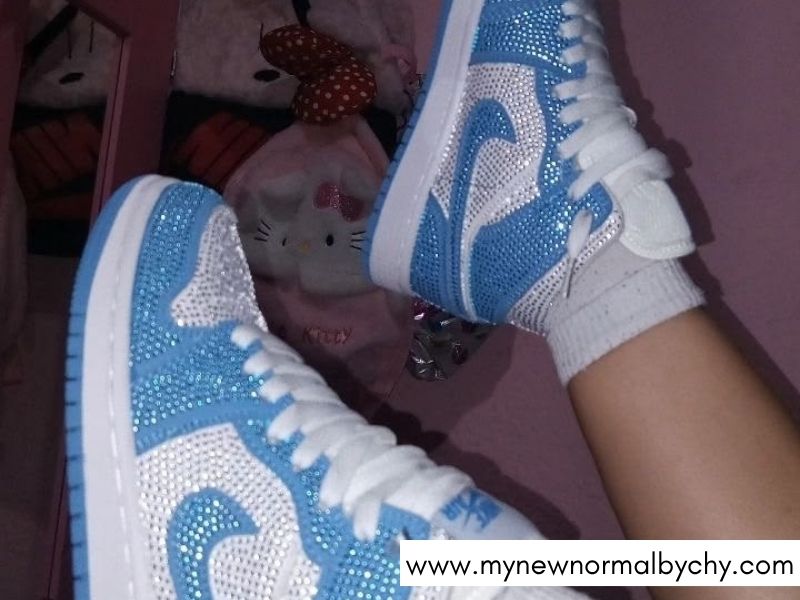
Many brides love incorporating the traditional “something blue” into their wedding attire, and your sneakers offer the perfect opportunity to do just that.
Instead of making blue the main feature, keep it subtle by adding sapphire-colored crystals around the heel, beneath the laces, inside floral patterns, or along the edge of the sole.
This small pop of color adds sentimental meaning while maintaining the timeless elegance of white bridal sneakers.
You can also combine soft blue crystals with pearls and silver rhinestones for a dreamy, fairy-tale-inspired design.
Perfect for:
- Traditional weddings
- Modern bridal looks
- Minimalist brides
- Brides following the “something old, something new, something borrowed, something blue” tradition
Make Your Wedding Shoes Truly One of a Kind
No matter which design you choose, remember that your wedding shoes should reflect your personality. Don’t be afraid to combine ideas, perhaps crystal toe caps with pearl heels, floral accents with personalized initials, or lace appliqués with champagne rhinestones.
Your DIY bedazzled wedding sneakers aren’t just another wedding accessory—they’re a beautiful keepsake you’ll cherish long after the celebration ends. Every sparkle tells part of your love story, making them as meaningful as they are beautiful.
Tips for a Luxury Look
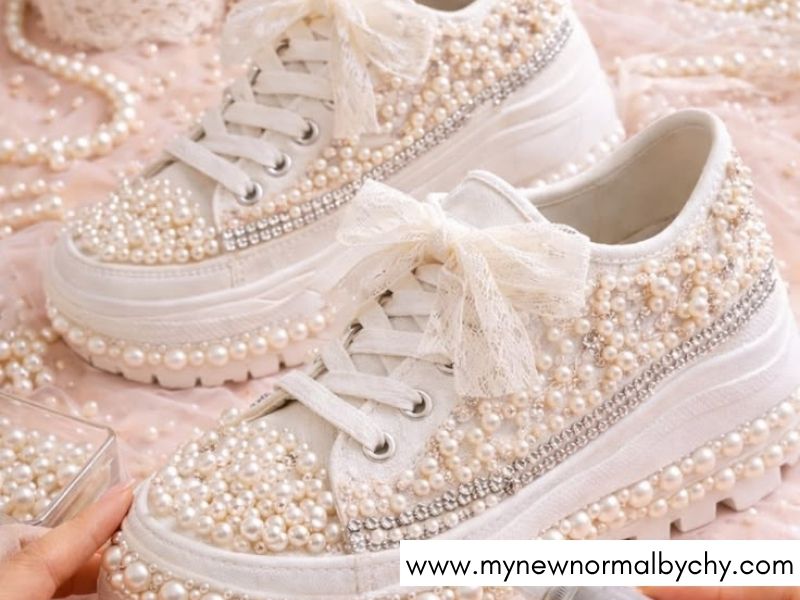
A few thoughtful details can make your DIY bridal sneakers look professionally made:
- Choose high-quality glass or crystal rhinestones for maximum sparkle.
- Mix large and small embellishments to add depth and dimension.
- Leave some of the shoe visible instead of covering every surface.
- Replace standard laces with satin ribbon laces for an instantly elegant upgrade.
- Coordinate the embellishments with your wedding jewelry or dress details.
- Finish with a protective spray suitable for embellished fabrics to help preserve your design.
Make Them a Lasting Keepsake
Your wedding shoes don’t have to be packed away after the celebration. Because bedazzled sneakers are both fashionable and practical, you can wear them again for your honeymoon, anniversary dinners, bridal brunches, or even casual date nights.
Every time you slip them on, they’ll remind you of one of the happiest days of your life—making them more than just a pair of shoes. They’ll become a sparkling keepsake filled with beautiful memories.
Best Rhinestones for Sneakers
One of the biggest secrets to creating professional-looking bedazzled sneakers is choosing the right type of rhinestones. While almost any flat-back rhinestone can be used, the material, weight, sparkle, and durability all affect how your finished shoes will look and how well they’ll hold up over time.
If you’re creating shoes for everyday wear, you’ll want rhinestones that are both beautiful and durable. On the other hand, if you’re making sneakers for a wedding, birthday, or special event, investing in higher-quality crystals can make a noticeable difference.
Below are the three most popular types of rhinestones used for DIY sneaker projects.
Resin Rhinestones
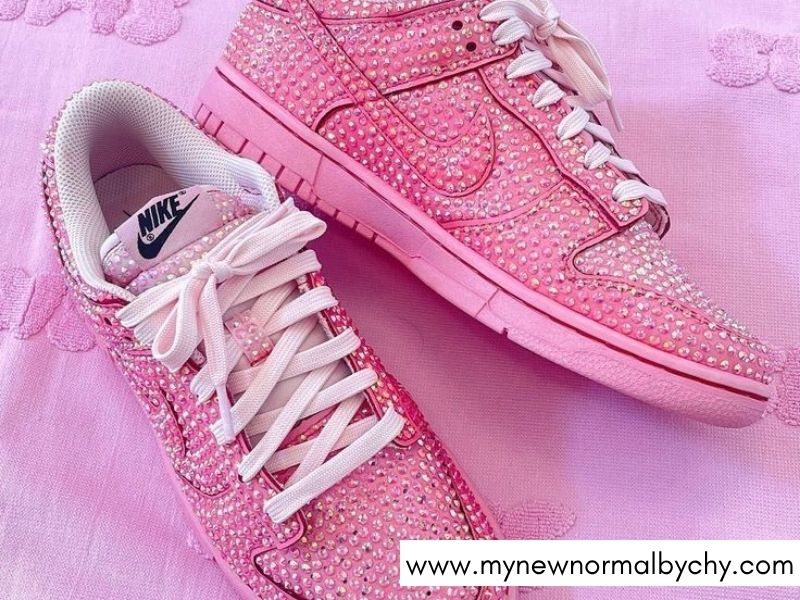
Resin rhinestones are the most affordable option, making them a favorite among beginners and budget-conscious crafters. They’re made from lightweight plastic resin and come in thousands of colors, shapes, and sizes.
Because they’re lightweight, they place less stress on the adhesive, making them ideal for decorating large areas of a shoe without adding too much weight.
Why Choose Resin Rhinestones
- Lightweight and comfortable to wear
- Affordable for large DIY projects
- Available in countless colors and finishes
- Easy to find in craft stores and online
- Beginner-friendly and easy to apply
- Great for practicing different patterns and layouts
While resin rhinestones don’t sparkle quite as brilliantly as glass or crystal options, they still create beautiful results in this Easy DIY Bedazzled Shoes for Beginners especially for colorful, playful, or themed sneaker designs.
Best for:
- Practice projects
- Children’s sneakers
- Festival shoes
- Casual everyday wear
- Y2K-inspired designs
- Bright, colorful sneakers
Glass Rhinestones
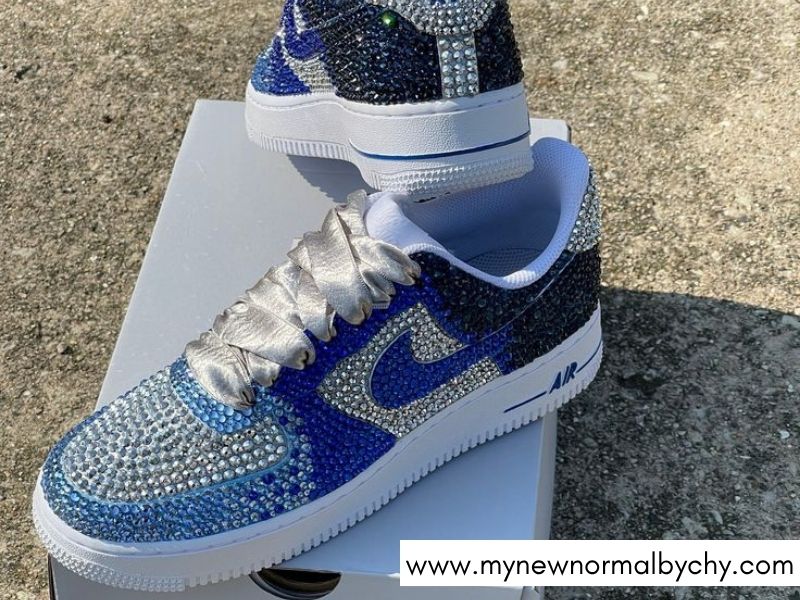
If you want your sneakers to look more expensive without spending a fortune, glass rhinestones are an excellent choice.
Made from cut glass, these rhinestones reflect light much better than resin, producing a richer sparkle and a more polished finish. They’re also more resistant to scratches, making them ideal for shoes you’ll wear regularly.
Although they’re slightly heavier than resin stones, they’re still comfortable enough for everyday use when applied correctly.
Benefits of Glass Rhinestones
- Brighter sparkle than resin
- Durable enough for frequent wear
- Excellent light reflection
- More luxurious appearance
- Available in many sizes and colors
- Long-lasting when paired with quality adhesive
Glass rhinestones strike the perfect balance between affordability and elegance, making them one of the most popular choices for DIY sneaker customization.
Best for:
- Fashion sneakers
- Birthday shoes
- Concert outfits
- Everyday custom sneakers
- Graduation shoes
- Holiday footwear
Crystal Rhinestones
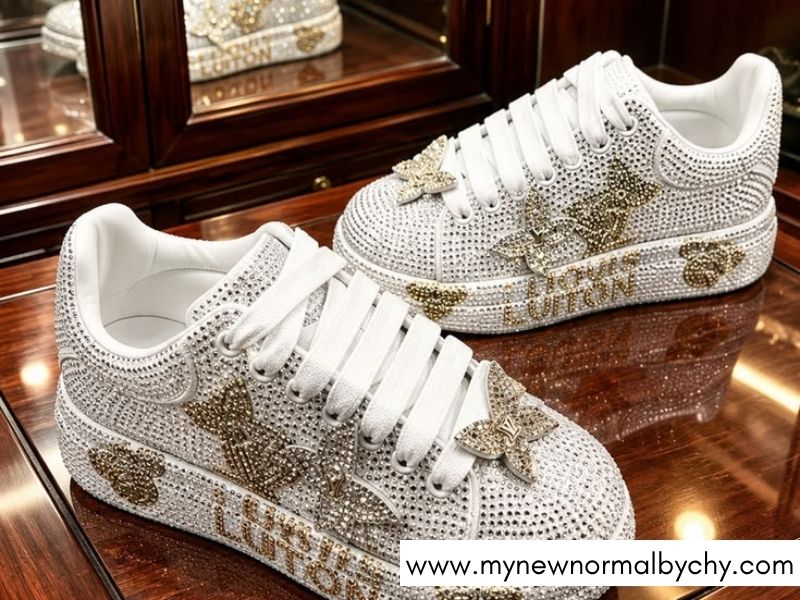
Crystal rhinestones are considered the gold standard for bedazzling. Their exceptional clarity and precision-cut facets create incredible sparkle, making them the preferred choice for luxury designs and special occasions.
Although they cost more than resin or glass rhinestones, the dazzling finish is often worth the investment—especially for projects you want to truly stand out.
Crystal rhinestones instantly elevate a simple pair of sneakers into something that looks professionally designed and boutique-worthy.
Why Crystal Rhinestones Are Worth It
- Maximum sparkle and brilliance
- Premium, luxury appearance
- Exceptional light reflection
- Highly durable
- Ideal for heirloom-quality projects
- Creates a high-end designer look
If you’re making bridal sneakers, anniversary shoes, or keepsake footwear, crystal rhinestones are hard to beat.
Best for:
- Wedding sneakers
- Bridal shoes
- Luxury custom sneakers
- Special occasions
- Photoshoots
- Formal events
Which Rhinestones Should You Choose?
Here’s a quick comparison to help you decide:
| Type | Sparkle | Durability | Price | Best For |
|---|---|---|---|---|
| Resin | ★★★☆☆ | ★★★☆☆ | Budget-friendly | Beginners & colorful DIY projects |
| Glass | ★★★★☆ | ★★★★☆ | Mid-range | Everyday fashion sneakers |
| Crystal | ★★★★★ | ★★★★★ | Premium | Bridal & luxury sneakers |
If you’re just starting out, resin or glass rhinestones are fantastic options. Once you’ve mastered the basics, upgrading to crystal rhinestones can give your projects an even more luxurious finish.
How to Bedazzle Sneakers Step by Step
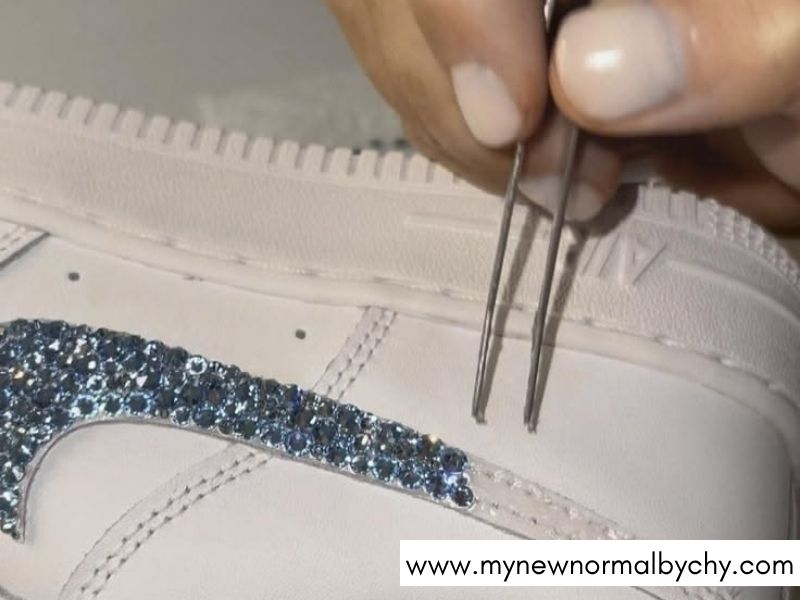
Now comes the fun part! Decorating your sneakers may seem intimidating at first, but by working slowly and following a few simple techniques, you’ll achieve a professional-looking result.
Remember—patience is your greatest tool. Rushing the process is one of the biggest reasons rhinestones become uneven or fall off later.
1. Clean Your Sneakers Thoroughly
Before applying a single rhinestone, make sure your shoes are completely clean.
Use rubbing alcohol and a lint-free cloth to remove dirt, oils, dust, and any factory coating from the surface. Even fingerprints can interfere with the adhesive, making rhinestones less likely to stay in place.
Allow the sneakers to dry completely before moving on.
Avoid using household cleaners, as some leave behind a residue that weakens the glue.
2. Plan Your Design First
One of the biggest mistakes beginners make is gluing rhinestones without first deciding on a layout.
Instead, place your rhinestones on the shoe without glue to experiment with different arrangements.
Try asking yourself:
- Do I want full coverage or subtle accents?
- Where should the sparkle be concentrated?
- Which colors work best together?
- Will I use different rhinestone sizes?
Once you’re happy with the arrangement, take a few photos from different angles. These reference photos will make it much easier to recreate your design once you begin gluing.
Spending a few extra minutes planning can save you hours of frustration later.
3. Apply Glue in Small Sections
Resist the temptation to spread glue over the entire sneaker at once.
Most craft adhesives begin drying quickly, so it’s much easier to work on sections about two to three inches wide.
Apply a thin layer of glue, then immediately begin placing rhinestones before moving on to the next section.
Working slowly also helps you:
- Keep lines straight
- Maintain even spacing
- Avoid messy glue marks
- Correct mistakes before the glue sets
Remember, a little glue goes a long way. Using too much can seep out around the rhinestones and dull the finished look.
4. Place Rhinestones Carefully
This is where your design really starts to come to life.
Use a wax rhinestone picker or precision tweezers to lift each stone and gently press it into the adhesive.
As you work:
- Start with larger rhinestones first.
- Fill around them with medium-sized stones.
- Finish with the smallest crystals to close tinnderneath.
Working methodically, one section at a time, will give your sneakers a clean, professional finish.
5. Fill Small Gaps for a Professional Finish
One trick that makes professionally decorated shoes look so polished is the use of multiple rhinestone sizes.
Instead of leaving awkward spaces between larger stones, fill them with smaller crystals.
This creates:
- Better coverage
- More sparkle
- Greater visual depth
- A smoother overall design
Many luxury shoe designers intentionally combine three or four rhinestone sizes to create a rich, dimensional effect that catches the light from every angle.
It’s these little finishing touches that make DIY sneakers look truly high-end.
6. Allow the Glue to Cure Completely
Once you’ve finished decorating, the hardest part is waiting.
Place your sneakers on a flat surface where they won’t be disturbed and allow the adhesive to cure according to the manufacturer’s instructions, typically between 24 and 48 hours.
Avoid touching or wearing the shoes during this time, even if they appear dry on the surface.
Giving the glue enough time to fully cure creates a much stronger bond, helping your rhinestones stay securely attached through everyday wear.
Before Wearing Your Sneakers
Once the glue has cured:
- Check for loose rhinestones.
- Reattach any stones if necessary.
- Wipe away any dried glue residue.
- Allow any touch-ups to dry completely.
Now your custom bedazzled sneakers are ready to wear and show off!
With the right materials, careful planning, and a little patience, you’ll end up with a pair of sparkling sneakers that look beautifully handcrafted and uniquely yours.
20 Easy Bedazzled Sneaker Ideas for Beginners
Not sure where to begin? Whether you prefer subtle sparkle or bold, eye-catching designs, these beginner-friendly bedazzled sneaker ideas offer something for every personality and occasion. Mix and match elements from different designs to create a pair that’s uniquely yours.
1. Crystal Toe Cap
If you’re new to bedazzling, a crystal toe cap is the perfect place to start. Instead of decorating the entire shoe, cover only the rubber or leather toe area with clear crystal rhinestones. This creates a luxurious designer-inspired look without requiring hours of work.
The sparkle catches the light beautifully while keeping the overall design clean and sophisticated.
Crystal Toe Cap is Exceptionally Perfect For
- Beginners
- Everyday wear
- Casual chic outfits
- Minimalist fashion lovers
2. Pearl Sneakers
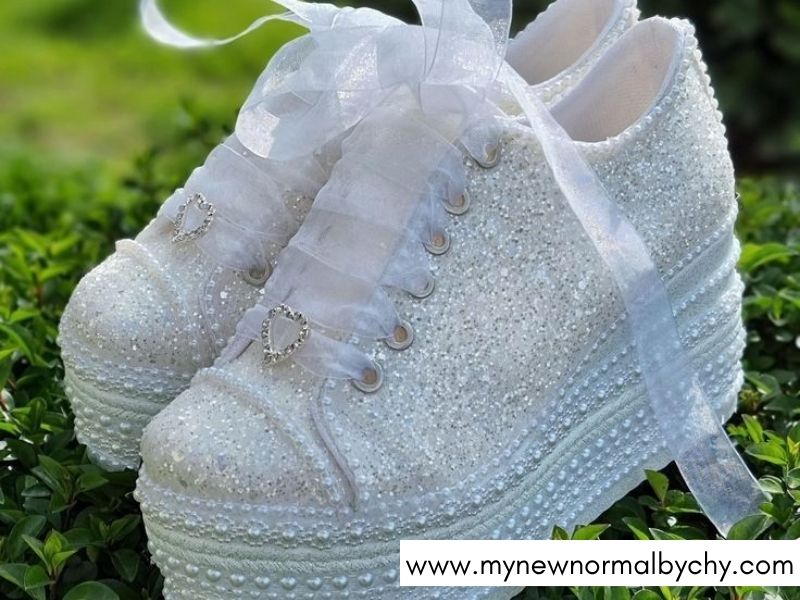
Pearls instantly make any pair of sneakers feel elegant and timeless. Decorate the sides, heel, or toe with pearls in different sizes to create texture and dimension.
You can pair the pearls with tiny crystal rhinestones for extra sparkle or keep the design entirely pearl-based for a softer, classic look.
These sneakers are especially popular for weddings, bridal showers, graduation photos, and special occasions.
Looks beautiful with:
- White sneakers
- Satin ribbon laces
- Lace outfits
- Neutral wardrobes
3. Rainbow Rhinestones
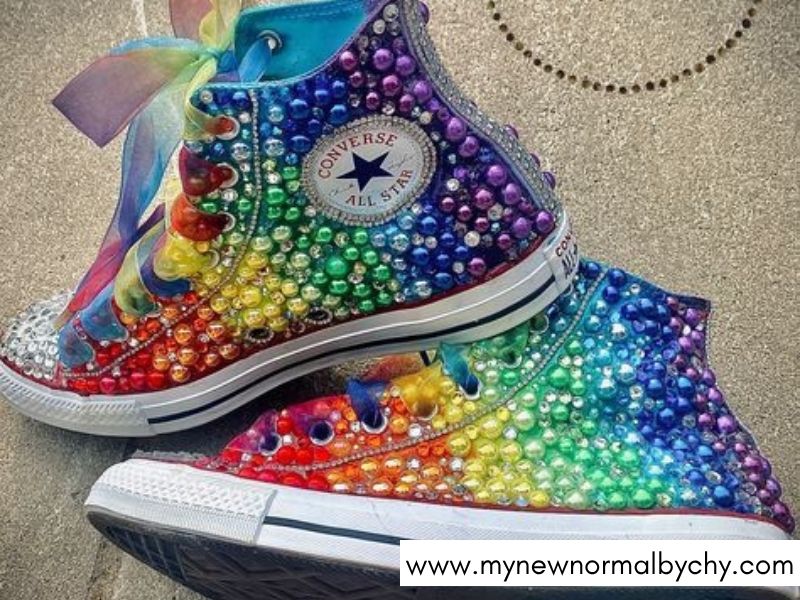
Love bright colors? Rainbow rhinestones create playful sneakers that instantly brighten any outfit.
Arrange colorful gems randomly for a fun confetti effect, or organize them in rainbow order for a more polished design.
This cheerful style is perfect for festivals, vacations, birthdays, Pride celebrations, or simply adding more personality to your wardrobe.
Popular colors include:
- Pink
- Orange
- Yellow
- Green
- Blue
- Purple
4. Ombre Sparkle
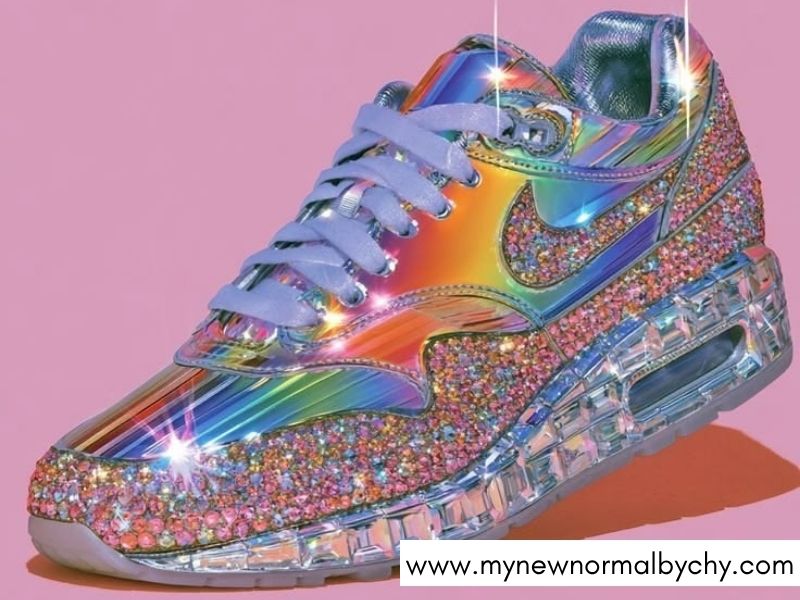
An ombre design blends one color seamlessly into another, creating a soft gradient effect that’s both modern and elegant.
Start with your darker color near the heel and gradually transition into a lighter shade toward the toe.
Some stunning color combinations include:
- Pink fading into white
- Blue blending into silver
- Gold transitioning into champagne
- Lavender fading into crystal
- Rose gold blending into ivory
Ombre sneakers look especially beautiful in natural sunlight.
5. Butterfly Sneakers
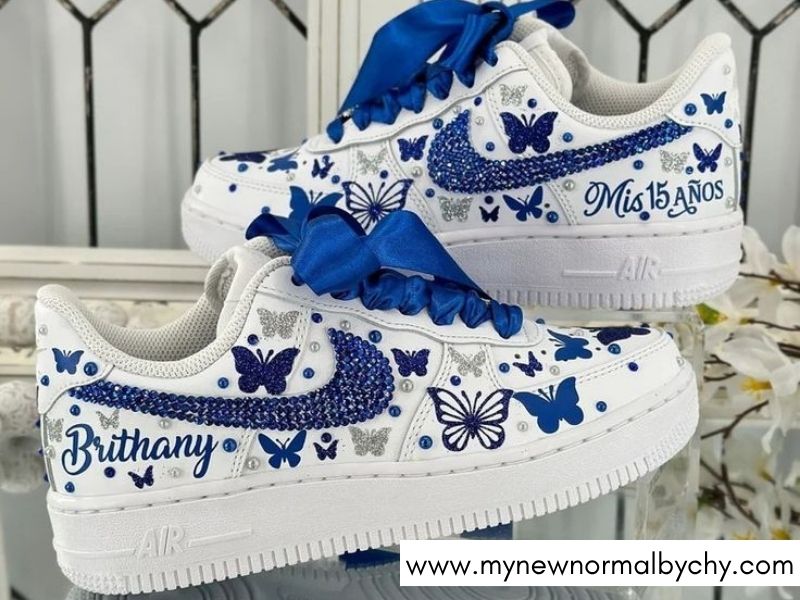
Butterflies symbolize beauty, growth, and transformation, making them one of the most popular bedazzling themes.
Use butterfly charms as focal points and surround them with tiny crystal trails to create the illusion that they’re fluttering across the shoe.
You can choose:
- Silver butterflies
- Gold butterflies
- Pastel butterflies
- Iridescent butterflies
This whimsical design pairs perfectly with spring and summer outfits.
6. Floral Sneakers
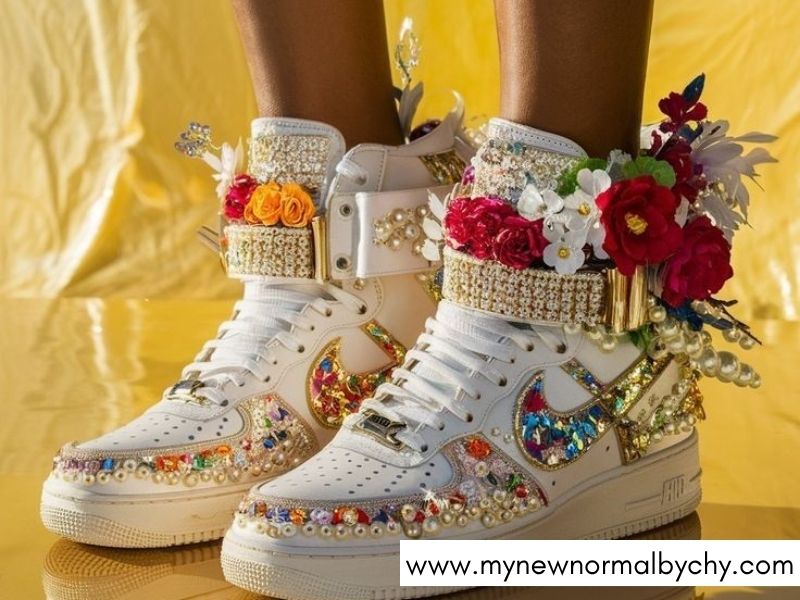
Bring the beauty of a flower garden to your footwear by arranging rhinestones into delicate floral patterns.
Create small daisies, roses, cherry blossoms, or wildflowers using colored crystals and pearl centers.
Instead of covering the entire sneaker, scatter flowers around the sides while leaving plenty of white space to create a fresh, airy look.
Perfect for:
- Spring fashion
- Garden parties
- Bridal events
- Everyday feminine style
7. Celestial Design
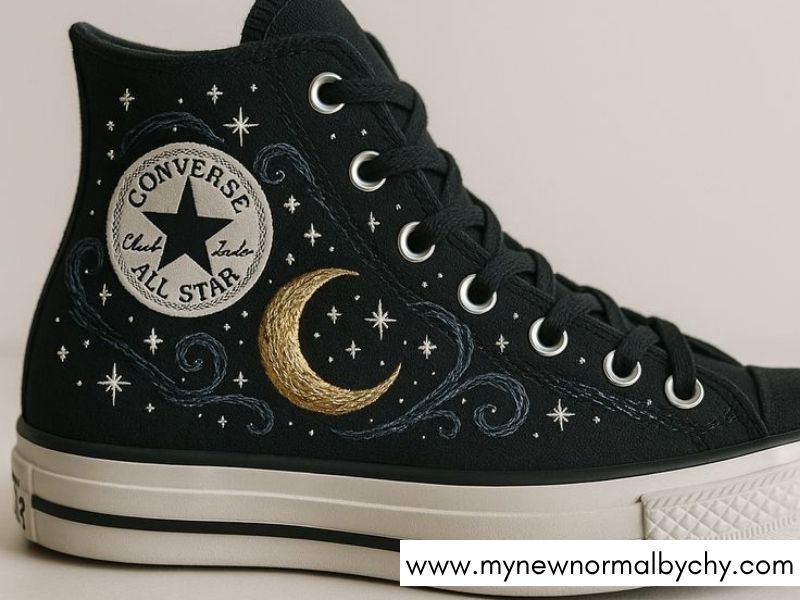
Create a dreamy night-sky aesthetic using celestial-inspired embellishments.
Decorate your sneakers with:
- Crescent moons
- Tiny stars
- Planets
- Silver rhinestones
- Iridescent crystals
- Midnight blue gemstones
This magical design is especially stunning on black, navy, or white sneakers.
8. Initial Sneakers
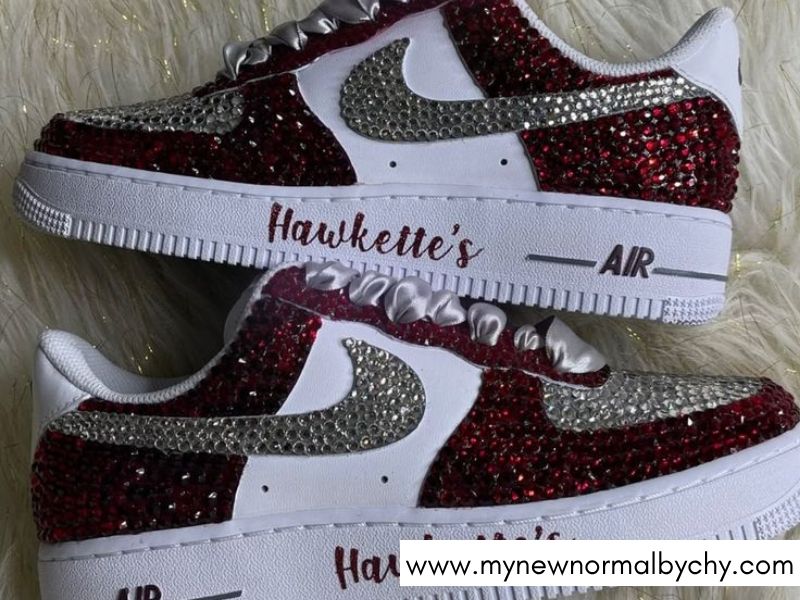
Personalized sneakers never go out of style.
Spell your initials—or even your full name—using crystal rhinestones or metallic letter charms.
Surround the lettering with smaller gems to create a custom design that’s both elegant and meaningful.
These also make thoughtful handmade gifts.
9. Heart Pattern Sneakers
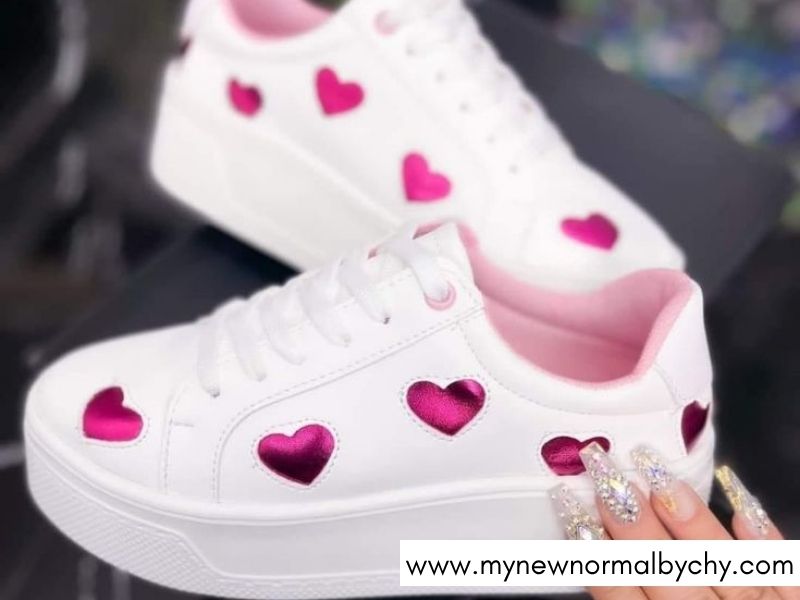
Nothing says cute quite like hearts.
Scatter tiny crystal hearts across the shoe or create one large statement heart on each side.
You can also combine hearts with pearls, bows, or butterflies for an ultra-feminine design.
Popular color choices include:
- Red
- Pink
- White
- Rose gold
These sneakers are especially popular around Valentine’s Day.
10. Cowgirl Glam
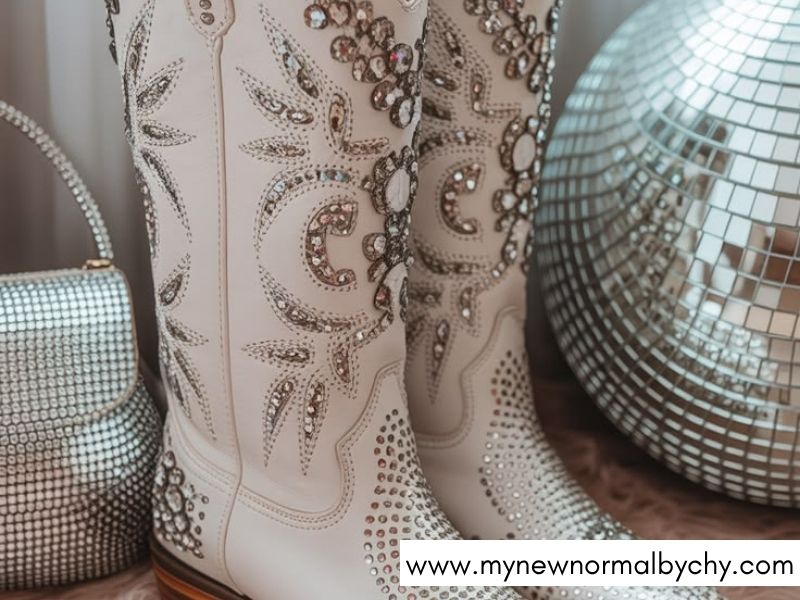
Western fashion continues to inspire trendy DIY projects, and bedazzled cowgirl sneakers are no exception.
Decorate your shoes with:
- Turquoise gemstones
- Silver stars
- Cowboy boot charms
- Horseshoes
- Cactus accents
- Metallic studs
This design pairs perfectly with denim jackets, cowboy hats, and country concert outfits.
11. Black and Gold Luxury
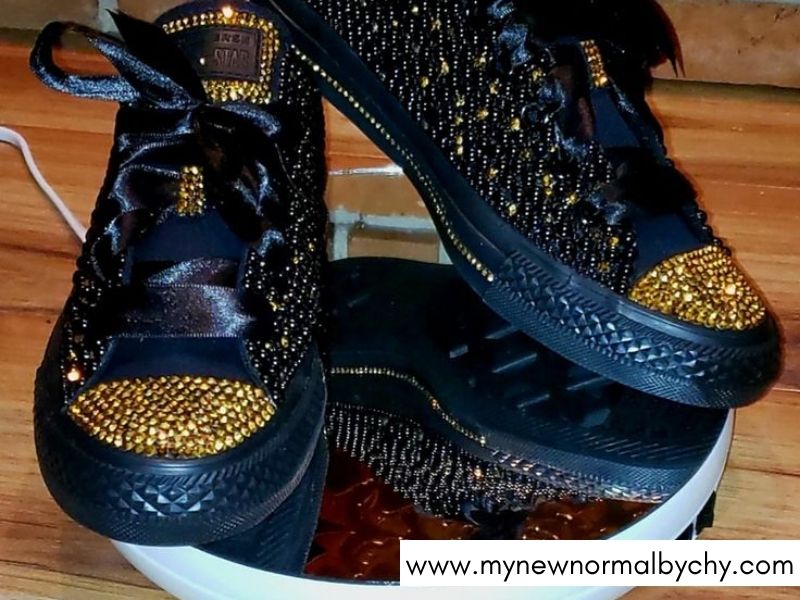
For a sleek, sophisticated look, combine black rhinestones with metallic gold crystals.
The contrast creates a rich, high-end appearance that looks surprisingly expensive.
This design works beautifully for:
- Evening events
- Date nights
- Fashion-forward outfits
- Luxury-inspired wardrobes
12. All-White Crystal Sneakers
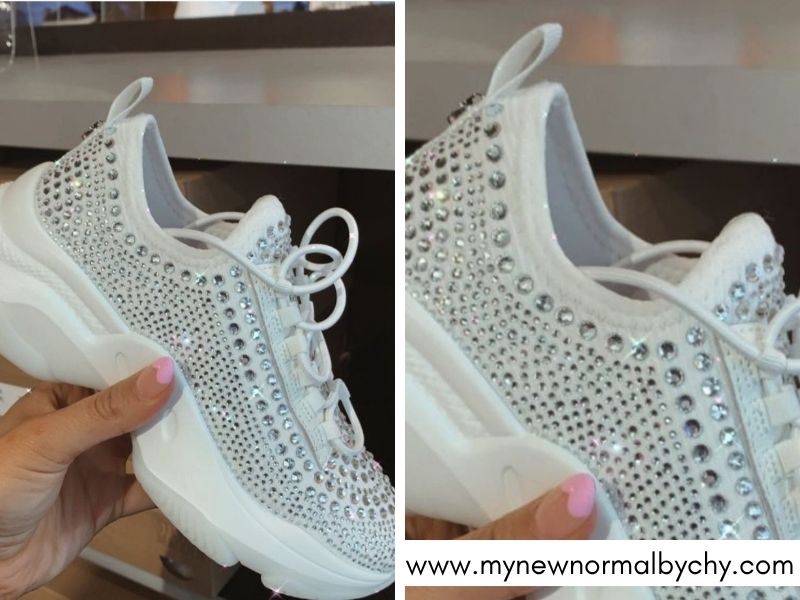
Sometimes simplicity creates the biggest impact.
Cover white sneakers with clear crystal rhinestones for an elegant monochromatic design that sparkles from every angle.
These timeless sneakers complement almost every outfit and are especially popular for brides and special occasions.
13. Y2K Sneakers
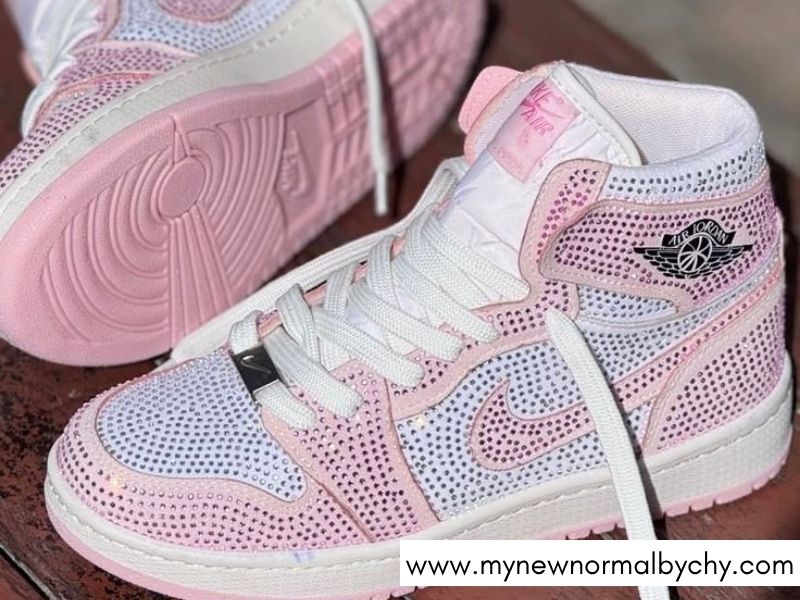
Bring back early-2000s nostalgia with playful Y2K-inspired decorations.
Mix fun embellishments like:
- Smiley faces
- Cherries
- Butterflies
- Puffy hearts
- Glitter stars
- Pink rhinestones
- Tiny bows
- Mini phone charms
The more colorful and playful, the better.
14. Cherry Design
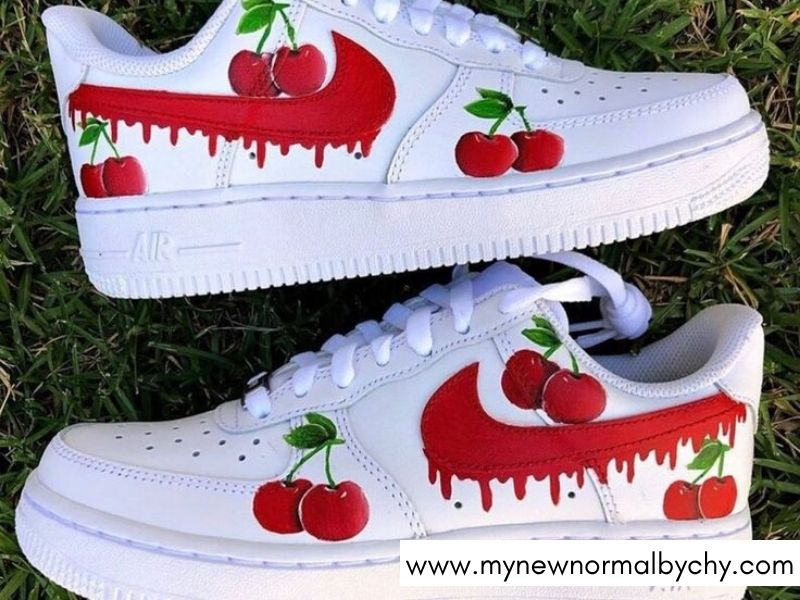
Cherry-themed accessories continue to trend because they’re cute, cheerful, and easy to recreate.
Use bright red rhinestones for the cherries and green crystals for the stems.
Scatter small cherry clusters around the sneaker or create one large statement design.
Perfect for:
- Summer outfits
- Picnics
- Vacation style
- Casual everyday wear
15. Leopard Print
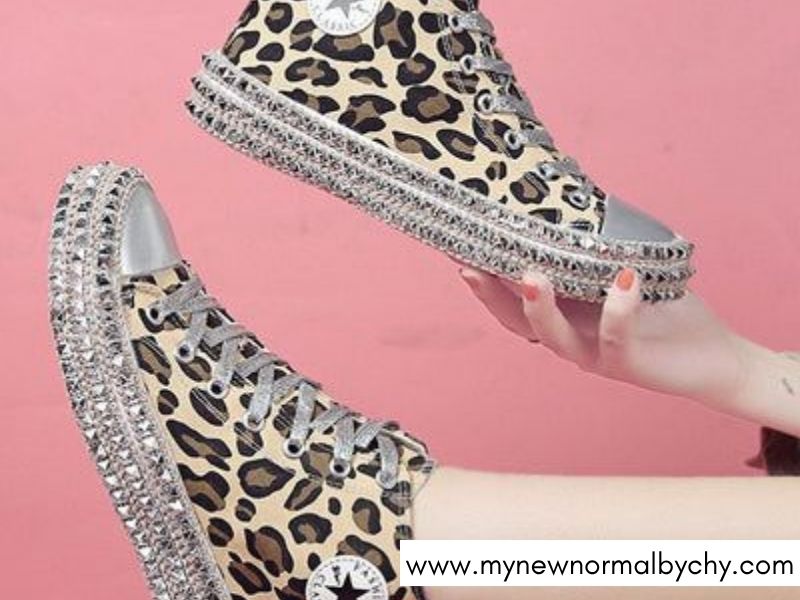
Animal prints never go out of fashion.
Use brown, black, amber, and gold rhinestones to recreate classic leopard spots across the sides or heel of the sneaker.
This bold design adds personality while remaining surprisingly versatile.
16. Coquette Style
The coquette aesthetic is soft, feminine, and incredibly popular.
Decorate your sneakers using:
- Faux pearls
- Satin bows
- Pink gemstones
- White rhinestones
- Tiny hearts
- Lace appliqués
The finished design feels romantic, delicate, and effortlessly Pinterest-worthy.
17. Wedding Sneakers
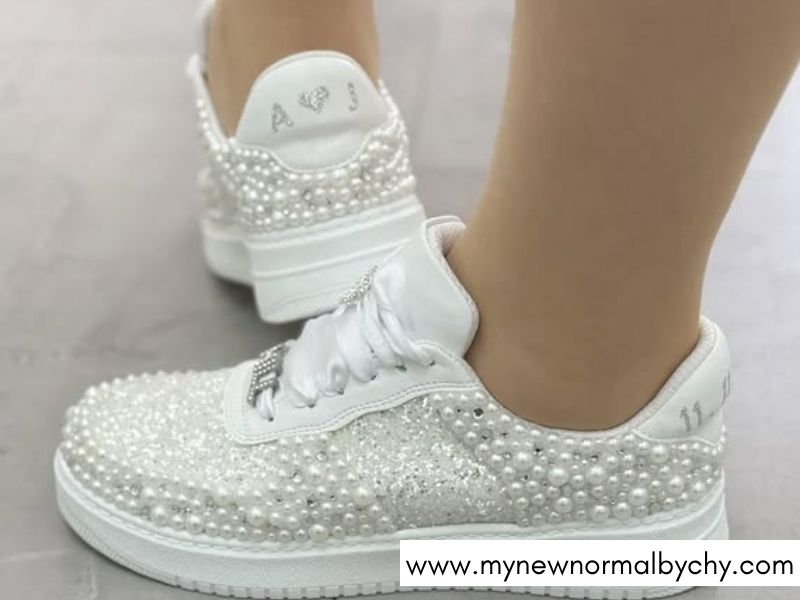
Who says bridal shoes have to be uncomfortable?
Transform plain white sneakers into elegant wedding footwear using:
- White pearls
- Crystal rhinestones
- Satin ribbon laces
- Monogram initials
- Wedding dates
- Delicate lace accents
They’re perfect for ceremonies, receptions, bridal showers, or honeymoon travel.
18. Galaxy Sneakers
Capture the beauty of the night sky with a cosmic-inspired design.
Blend together:
- Navy crystals
- Purple rhinestones
- Silver gems
- Iridescent stones
- Tiny stars
- Moon charms
The finished sneakers shimmer beautifully from every angle.
19. Minimal Side Stripe
If bold sparkle isn’t your style, keep things simple.
Decorate only one side of each sneaker with a narrow line of rhinestones or pearls.
This subtle detail adds just enough glamour while remaining suitable for everyday outfits.
Minimal designs are also much quicker to complete, making them ideal for beginners.
20. Full Crystal Sneakers
Ready for the ultimate challenge?
Cover every visible surface of your sneakers with rhinestones in a variety of sizes.
By layering large, medium, and tiny crystals together, you’ll create incredible depth and maximum sparkle.
Although this project requires patience, the final result looks like something straight from a luxury designer boutique.
If you’re looking for a true statement piece, this dazzling design is guaranteed to turn heads wherever you go.
Common Mistakes to Avoid On Easy DIY Bedazzled Shoes for Beginners
Creating your first pair of bedazzled sneakers is exciting, but a few simple mistakes can affect how your finished project looks and how long it lasts. The good news? Most of these problems are completely avoidable with a little patience and preparation.
Before you start decorating, keep these common DIY mistakes in mind to ensure your sneakers look beautiful and stay sparkling for as long as possible.
1. Using Cheap Glue
One of the biggest mistakes beginners make is choosing the wrong adhesive. While it may be tempting to use ordinary craft glue or a low-cost alternative, these products often aren’t strong enough to hold rhinestones securely—especially on shoes that bend and move while you walk.
Weak adhesives can cause rhinestones to loosen, shift, or fall off after only a few wears, leaving your design looking uneven.
Instead, invest in a high-quality adhesive that’s specifically designed for fabric, leather, or embellishment projects. A reliable glue forms a stronger bond and helps your hard work last much longer.
Always test your adhesive on a small, hidden area of the shoe before decorating the entire sneaker.
2. Working Too Fast
It’s easy to get excited once you begin adding rhinestones, but rushing the process often leads to crooked lines, uneven spacing, and misplaced embellishments.
Professional-looking sneakers aren’t created quickly—they’re created carefully.
Work on one small section at a time, checking your alignment as you go. If something doesn’t look quite right, adjust it before the glue starts to set.
Remember, bedazzling is meant to be an enjoyable creative project, not a race.
Taking short breaks can help you spot small mistakes with fresh eyes before they become permanent.
3. Applying Too Much Glue
Many beginners assume that using more glue will make the rhinestones stick better. In reality, the opposite is often true.
Excess glue can ooze out from underneath the stones, leaving cloudy marks and making your finished design look messy. It can also reduce the sparkle of your rhinestones if it dries over the edges.
Instead, apply a thin, even layer of adhesive or place tiny dots of glue exactly where each rhinestone will sit.
Remember, less is more when it comes to bedazzling.
If glue accidentally squeezes out, gently remove the excess with a cotton swab before it dries.
4. Skipping Surface Cleaning
No matter how expensive your rhinestones are, they won’t stay attached if the shoe isn’t properly prepared.
Dust, oils from your hands, factory coatings, and everyday dirt create a barrier between the shoe and the adhesive, making it much harder for the glue to bond.
Before you begin decorating, wipe the entire surface with rubbing alcohol and allow it to dry completely.
This simple step only takes a few minutes but can dramatically improve the durability of your finished project.
Avoid touching the cleaned areas with your fingers before applying the glue, as natural skin oils can reduce adhesion.
5. Wearing Your Shoes Too Soon
After spending hours decorating your sneakers, it’s understandable to want to wear them immediately—but patience is essential.
Even if the glue feels dry to the touch, it may still be curing underneath. Wearing your sneakers too soon can shift the rhinestones, weaken the adhesive, or cause gems to fall off before they’ve fully bonded.
Most industrial-strength craft glues require 24 to 48 hours to cure completely, though you should always check the manufacturer’s instructions.
Giving your shoes enough time to dry will help ensure your design stays intact through everyday wear.
Place your sneakers on a flat surface in a cool, dry area while they cure, and avoid moving or handling them unnecessarily.
How to Make Your Bedazzled Sneakers Last
Follow these simple tips.
- Avoid machine washing.
- Spot-clean with a damp cloth.
- Store shoes in a dust bag or shoe box.
- Keep them away from excessive moisture.
- Replace loose rhinestones immediately.
With proper care, your shoes can stay beautiful for years.
What Else Can You Bedazzle?
Once you’ve mastered sneakers, try decorating:
- Phone cases
- Laptop cases
- AirPods cases
- Water bottles
- Tumbler cups
- Denim jackets
- Baseball caps
- Tote bags
- Hair clips
- Sunglasses
- Handbags
- Picture frames
Frequently Asked Questions About Easy DIY Bedazzled Shoes for Beginners
What glue works best for bedazzled sneakers?
Industrial-strength craft adhesives like E6000 and Gem-Tac are popular because they create a strong bond while remaining flexible enough for wearable projects.
Can I wash bedazzled sneakers?
It’s best to avoid machine washing. Instead, wipe them gently with a soft damp cloth and allow them to air dry.
How long does it take to bedazzle sneakers?
A simple design may take one to three hours, while fully rhinestone-covered sneakers can take several evenings depending on the level of detail.
Do rhinestones fall off easily?
Not if they’re applied correctly with a high-quality adhesive and given enough time to cure before wearing.
Are bedazzled sneakers suitable for beginners?
Yes! Start with a simple pattern, such as a crystal toe cap or side stripe, before attempting a full-coverage design.
Final Thoughts
Creating your own bedazzled sneakers on this Easy DIY Bedazzled Shoes for Beginners guide is one of the easiest ways to personalize your footwear without spending designer prices. Whether you prefer understated crystal details or bold, full-coverage sparkle, there’s a design to match every style and skill level.
Start with a simple project, invest in quality materials, and don’t rush the process. Before long, you’ll have a pair of custom sneakers that look unique, stylish, and completely your own.
Don’t worry if your first pair isn’t flawless. Every Easy DIY Bedazzled Shoes for Beginners project helps you improve your technique, learn what works best, and build confidence for future designs.
Start with simple patterns, take your time, and enjoy the creative process. Before long, you’ll be creating beautiful, custom bedazzled sneakers that look polished, professional, and uniquely yours.
Related DIY Ideas
If you enjoyed this project, you might also like:
- DIY Bedazzled Phone Case Ideas
- Creative Bedazzled Tumbler Ideas
- Easy Rhinestone Craft Projects for Beginners
- DIY Bedazzled Denim Jacket Ideas
- Cute DIY Gifts You Can Make at Home
Leave a Reply